Wednesday, February 21, 2018

Running Medal Holder Tutorial!

My new medal holder!

A few weeks ago, my husband and I heard a loud clatter in the middle of the night coming from the front of the house. Turns out my running medal holder had crashed from the wall, spilling all my medals in the process! 


The old one :)

The timing worked out well since I wasn't crazy about the holder I had made (it was one of my very first Silhouette projects two years ago), and I had an idea for an updated version that was more "me" in design.


I started with a 5.5" x 24" wooden board from Home Depot. They are sold individually cut to this size, however I already had this one in my garage from a previous project. I gave it a light sanding, wiped it down, and applied a coat of Minwax stain in Jacobean using a foam brush. I used an old sock to wipe the excess stain off and let the piece dry overnight. 

One coat of clear polycrylic on top of the stained wood sealed the piece (and will keep it from perpetually smelling like stain). I like how polycrylic doesn't yellow over time, unlike a polyurethane. The poly also gives a smooth clean surface for whatever you want to put on top of it, like adhesive vinyl, paint, or glue. I've had a few craft fails from my vinyl not sticking to a stained surface. Lesson learned!


Next came the design. I created a box in Silhouette Studio the same size and shape as my wood, and even used a textured fill to replicate the wood. Then I wrote out my phrase and sized the wording to fit the box. The fonts I use here can both be purchased in the Silhouette Studio Store: "LW Clever" for the word RUN, and "PN Bacon Please" for the script. When working with a script that will be cut, I always weld the letters together in Silhouette Studio so they flow together. 


My old medal holder was painted wood with adhesive vinyl on top, but this time I wanted to try out stenciling with chalk paint. I was able to the arrange the words onto one 12"x12" box and sent my design to the Silhouette on a pre-cut 12"x12" sheet of vinyl stenciling material. I used Cricut stenciling vinyl, which I would highly recommend! 


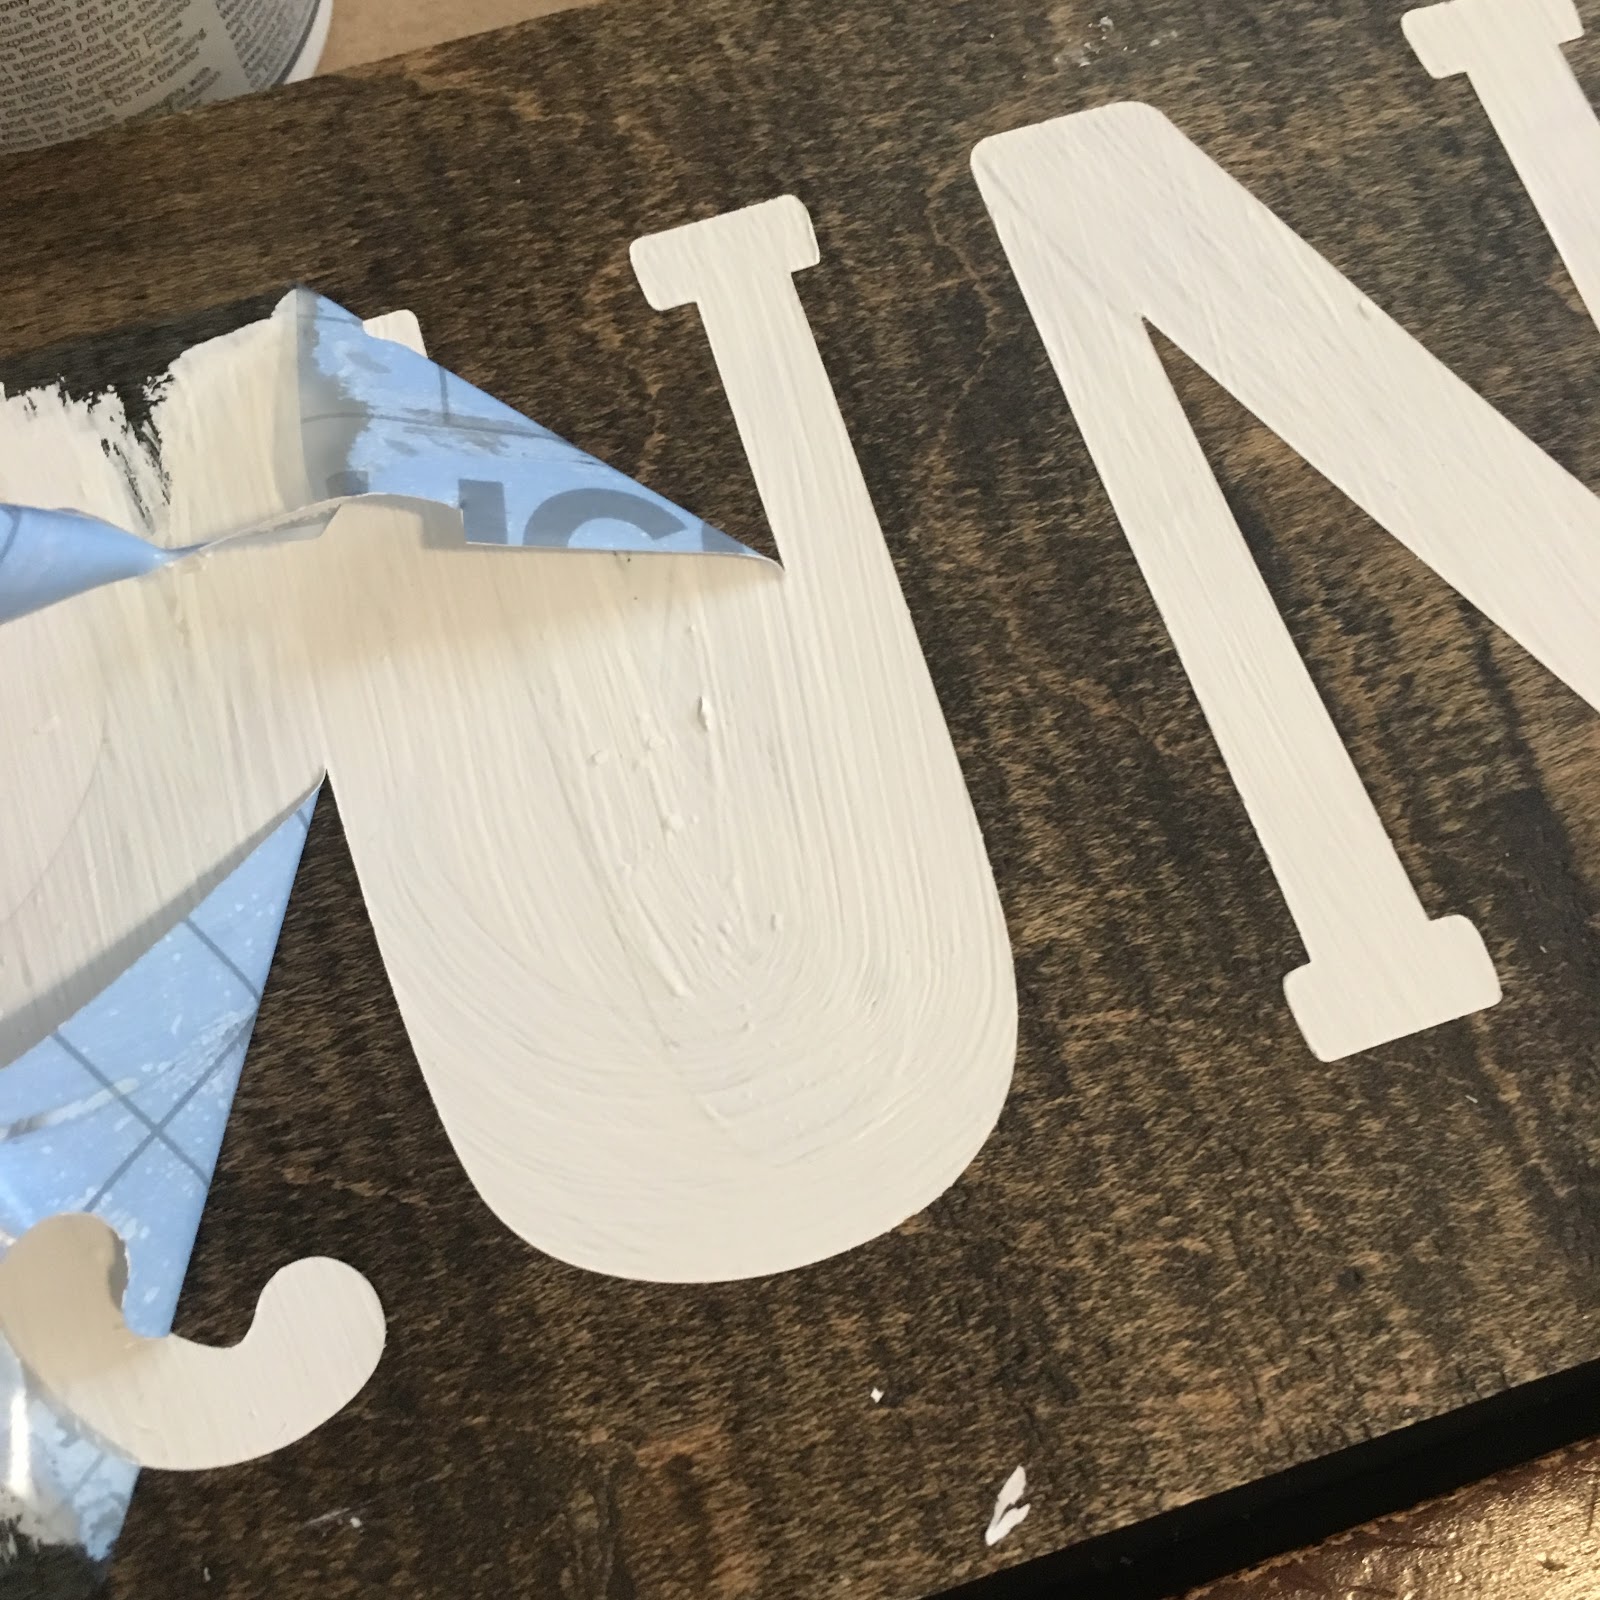
Next came the weeding. Remember that I plan to use this as a stencil, so I was weeding the words out and leaving the negative space in. Felt weird, since I usually weed out the negative space! I put some Craftopia transfer tape on top, cut the pieces, and transferred them onto the wood. I used a ruler to make sure they were relatively even before burnishing them on there. Don't be afraid to burnish them well since you don't want paint to end up seeping under the stencil.


After peeling off the transfer tape, I started to chalk paint the letters. With stenciling, you want to *dab* more than paint so that you're not getting paint under the stencil. You can use a foam brush, a dauber tool, or even a makeup sponge. I used a foam brush and did a few light coats of Annie Sloan chalk paint in Pure White. Since there isn't any pigment in this shade, it takes a few coats to get it to be opaque. 


Side note: I purchased this small sample size from a local shop in Old Town Auburn called Re-Find Living. The staff is very knowledgeable about all things chalk paint and has great advice! I highly recommend checking them out if you're local.


I let it fully dry (about 30 minutes) before peeling off the sticker. I wasn't sure how it would turn out since we had some bleeding problems with lettering at my last craft night, but letting the paint dry fully really worked! I got nice clean edges.


The last design element of this project involved putting a heart at the center. It both illustrates the quote on the board and is a nod to my habit of searching for heart-shaped rocks on long trail runs. To this end, I planned to use one of the heart-shaped rocks from my collection to mount in the center of the board using a strong epoxy glue. But when I had it lined up, each rock I chose was either the wrong size or just blended into the color of the wood. 


My five-year-old lined up our heart-rock collection in the shape of a heart.
See his little boy foot down there??
He's got flat-lay skills already.

Then I remembered the mountainscapes I had been obsessing over lately - painting different layered gradients of the same color to demonstrate atmospheric perspective. I thought that would be the perfect way to paint a heart in the center of this piece, as it would be a tie-in to my love of the mountains and canyons in Auburn, CA where I run.


I went back to Silhouette Studio and traced a simple clipart heart shape to fit the space and had my machine cut it onto a scrap of the stenciling material.

Then I used a mix of blue with a dot of green acrylic craft paint, some white paint, and some black paint, and created five shades of the same color. I put the heart stencil on the board and carefully painted in the mountain scene. There's a great Youtube tutorial of the process by artist Studio Silver Creek that can be viewed here if you want to try the technique yourself.


After that dried, I peeled back the stencil and again found clean lines (phew!).

Last steps involved the hardware: I used two sawtooth hangers on the back and attached them with tiny nails. Then I screwed three cup hooks into the bottom of the board and added a 1/2" dowel that had been stained to match the board. 


I culled my medal collection to weed out duplicates from the same races in different years or medals for shorter distance races, and carefully hung up my favorites.


I love how it turned out! I feel like it represents me well. It's proudly on display in my little office nook in our playroom. It brings me joy every day! How do you display your running bling?


Friday, January 5, 2018

DIY Playroom Storage Labels

It's finally January! While I love the Christmas season, I also love to pack up the decorations and tree, (#teamfake) and see some space in our house again. It's also time to take inventory of all the new toys my kids have acquired over the holidays and help them to find a home!


When we moved into our current home, it had this great little formal dining room off the kitchen, for which I had no real use. By the time my oldest started toddling, we I purchased some Ikea Expedit shelving units and turned the space into a playroom, where I could watch the kids while I cooked.


It's a small space, and it is fully visible from the front door. My desk and computer also live in this space. So, naturally, I like to keep it tidy and organized since we're looking at it all day!


While the Ikea Expedit shelves (which have since been replaced with the Kallax line of shelving) match with an adorable line of perfectly fitting bins and baskets, they just weren't right for our space - both in price and style. I knew they wouldn't be easy to see into or for little hands to put back (which leads to toy dumping). 


These Dollar Tree bins were a great alternative both in price and in style. I like that they are smaller than each cubby so that you can easily add toys or see what's inside without removing the bin completely from the shelf. Other toys fit really well into these pretzel barrels we had collected over the course of a year (that's a lot of pretzels!).


I've had these same labels for several years, but about once a year, I like to reassess the toy categories and change things up. My boys are three and five, so Lego, Nerf, and board games are big for them this year. I needed to add in a few more labels and remove others.


To give my labels a cohesive look, I used my Silhouette Cameo to make some simple black and white labels, inspired by the chalkboard look. I used heavyweight black cardstock that came in half sheet sizes from Michaels and white Oracal 651 vinyl


In Silhouette Studio, I designed the labels with a simple, easy to read font. This one is called Jasmine UPC. I also drew boxes around each word so that I could weed each word individually.


After cutting, I weeded out the words, put some clear transfer tape over the top (I use this brand), and transferred the word onto each black piece of cardstock. 


This little one also wanted to help make labels, so he got some cardstock as well!


I took the project a step further and laminated each label with this laminator to make them even more durable (have I mentioned I have boys?). 


A few hole punches and some twine, and my labels were ready to add to my bins. The Lego label was going on a different type of container, so I trimmed the card stock before laminating and used my Xyron Creative Station to add an even coating of adhesive to the back. It stuck to our Lego tote perfectly. 


I love reusing containers in creative ways. If you look closely, you'll also see an animal cracker bin for our Jenga blocks and an almond container for our ABC blocks. Often times when organizing, it's tempting to go out and buy all new. But I challenge you instead to edit your collection first, and then see what containers you already have. If I find myself wanting to go out to buy an organizing tool or container, it's a clue that I have too much stuff!


For some people, this style of toy storage is too many categories, but it seems to work really well for us. Although my kids are preliterate, they know what goes in each bin and can easily find the toy they are looking for (no dumping necessary!). And it's less overwhelming to clean up when they can see clear categories and can visually break down what has been left out. Instead of #allofthetoys, they see a few categories: Nerf guns and cars.

Hope you enjoyed my play room tour and label tutorial! It's not the most glamorous or Pinterest-worthy, but it is functional and neat. And most importantly, it's a place my kids want to play! How do you store and organize toys?

Sunday, December 24, 2017

DIY Gratitude Jar with Silhouette Cameo


My husband's Aunt Betty was telling me about a gratitude jar the last time we were at her house. It's a jar to which you add a piece of paper every day after jotting down something you're grateful for. At the end of the year, or even just on a tough day, you can dig into the jar and read all the many things you were grateful for throughout the year. I loved the idea! And she hinted that it was maybe something I could make with my Silhouette Cameo. Challenge accepted!


We're heading to her house for Christmas Eve tonight, and I'm putting together a gratitude jar for her as a hostess gift. I'll show you all the steps below for this 30 minute DIY!


I started with a Ball smooth-sided, wide-mouthed quart mason jar. I like how the opening is wide enough to fit your hand and the sides don't have a raised design to get in the way of a vinyl sticker.


I used a few designs from the Silhouette Studio store to make a design on the jar that says, "Grateful, Thankful, Blessed," with a laurel on the bottom and a small heart to fill what was an otherwise empty space. 

I decided to go with white vinyl, because white is classic, subtle, and matches all decor. Plus, it would go great with the rose gold Rustoleum spray paint I had picked out for the lid!


I used a 4"x5" scrap of permanent adhesive vinyl (I used Oracal 651), and taped it down to my cutting mat with a little washi tape. I like to do this with smaller cuts of vinyl because I'm using an older mat with less stick, and it keeps the vinyl from shifting around during cutting.

Next comes the weeding. That's the crafting term for removing all the teeny tiny pieces of vinyl, like the tiny circle in center of the letter O.


This piece had lots of itty bitty weeding to do! Strong overhead lighting and a hook tool from Silhouette make quick work of it. And it's actually pretty relaxing.


I put a piece of clear transfer tape on top. I like this kind from Craftopia, because it is clear and has guidelines to keep your image straight. Plus it comes with a free burnishing tool!


Burnish the whole thing with a scraper tool like this one from Craftopia (or credit card) to help the transfer tape adhere to the design, and slowly peel it up, making sure every letter sticks!


I laid the jar in my lap between my legs to keep it still and straight while I centered the vinyl. Once it was stuck on there, I burnished it one more time and carefully peeled back the transfer tape, making sure all the letters stuck to the jar.


One more step: spray paint the lid! Mason jar lids typically come in two parts: the lid and the ring. I separated them and gave them both a quick two coats of rose gold spray paint. This went on smoothly and only took about 30 minutes to dry (although I let it sit a little longer just in case). 


To wrap it up, I stuffed the jar with some teal paper to let the design pop, and added a small pile of cards to use for daily gratitude notes. 

I hope she likes it!