 |
| My new medal holder! |
A few weeks ago, my husband and I heard a loud clatter in the middle of the night coming from the front of the house. Turns out my running medal holder had crashed from the wall, spilling all my medals in the process!
 |
| The old one :) |
The timing worked out well since I wasn't crazy about the holder I had made (it was one of my very first Silhouette projects two years ago), and I had an idea for an updated version that was more "me" in design.

I started with a 5.5" x 24" wooden board from Home Depot. They are sold individually cut to this size, however I already had this one in my garage from a previous project. I gave it a light sanding, wiped it down, and applied a coat of Minwax stain in Jacobean using a foam brush. I used an old sock to wipe the excess stain off and let the piece dry overnight.
One coat of clear polycrylic on top of the stained wood sealed the piece (and will keep it from perpetually smelling like stain). I like how polycrylic doesn't yellow over time, unlike a polyurethane. The poly also gives a smooth clean surface for whatever you want to put on top of it, like adhesive vinyl, paint, or glue. I've had a few craft fails from my vinyl not sticking to a stained surface. Lesson learned!

Next came the design. I created a box in Silhouette Studio the same size and shape as my wood, and even used a textured fill to replicate the wood. Then I wrote out my phrase and sized the wording to fit the box. The fonts I use here can both be purchased in the Silhouette Studio Store: "LW Clever" for the word RUN, and "PN Bacon Please" for the script. When working with a script that will be cut, I always weld the letters together in Silhouette Studio so they flow together.

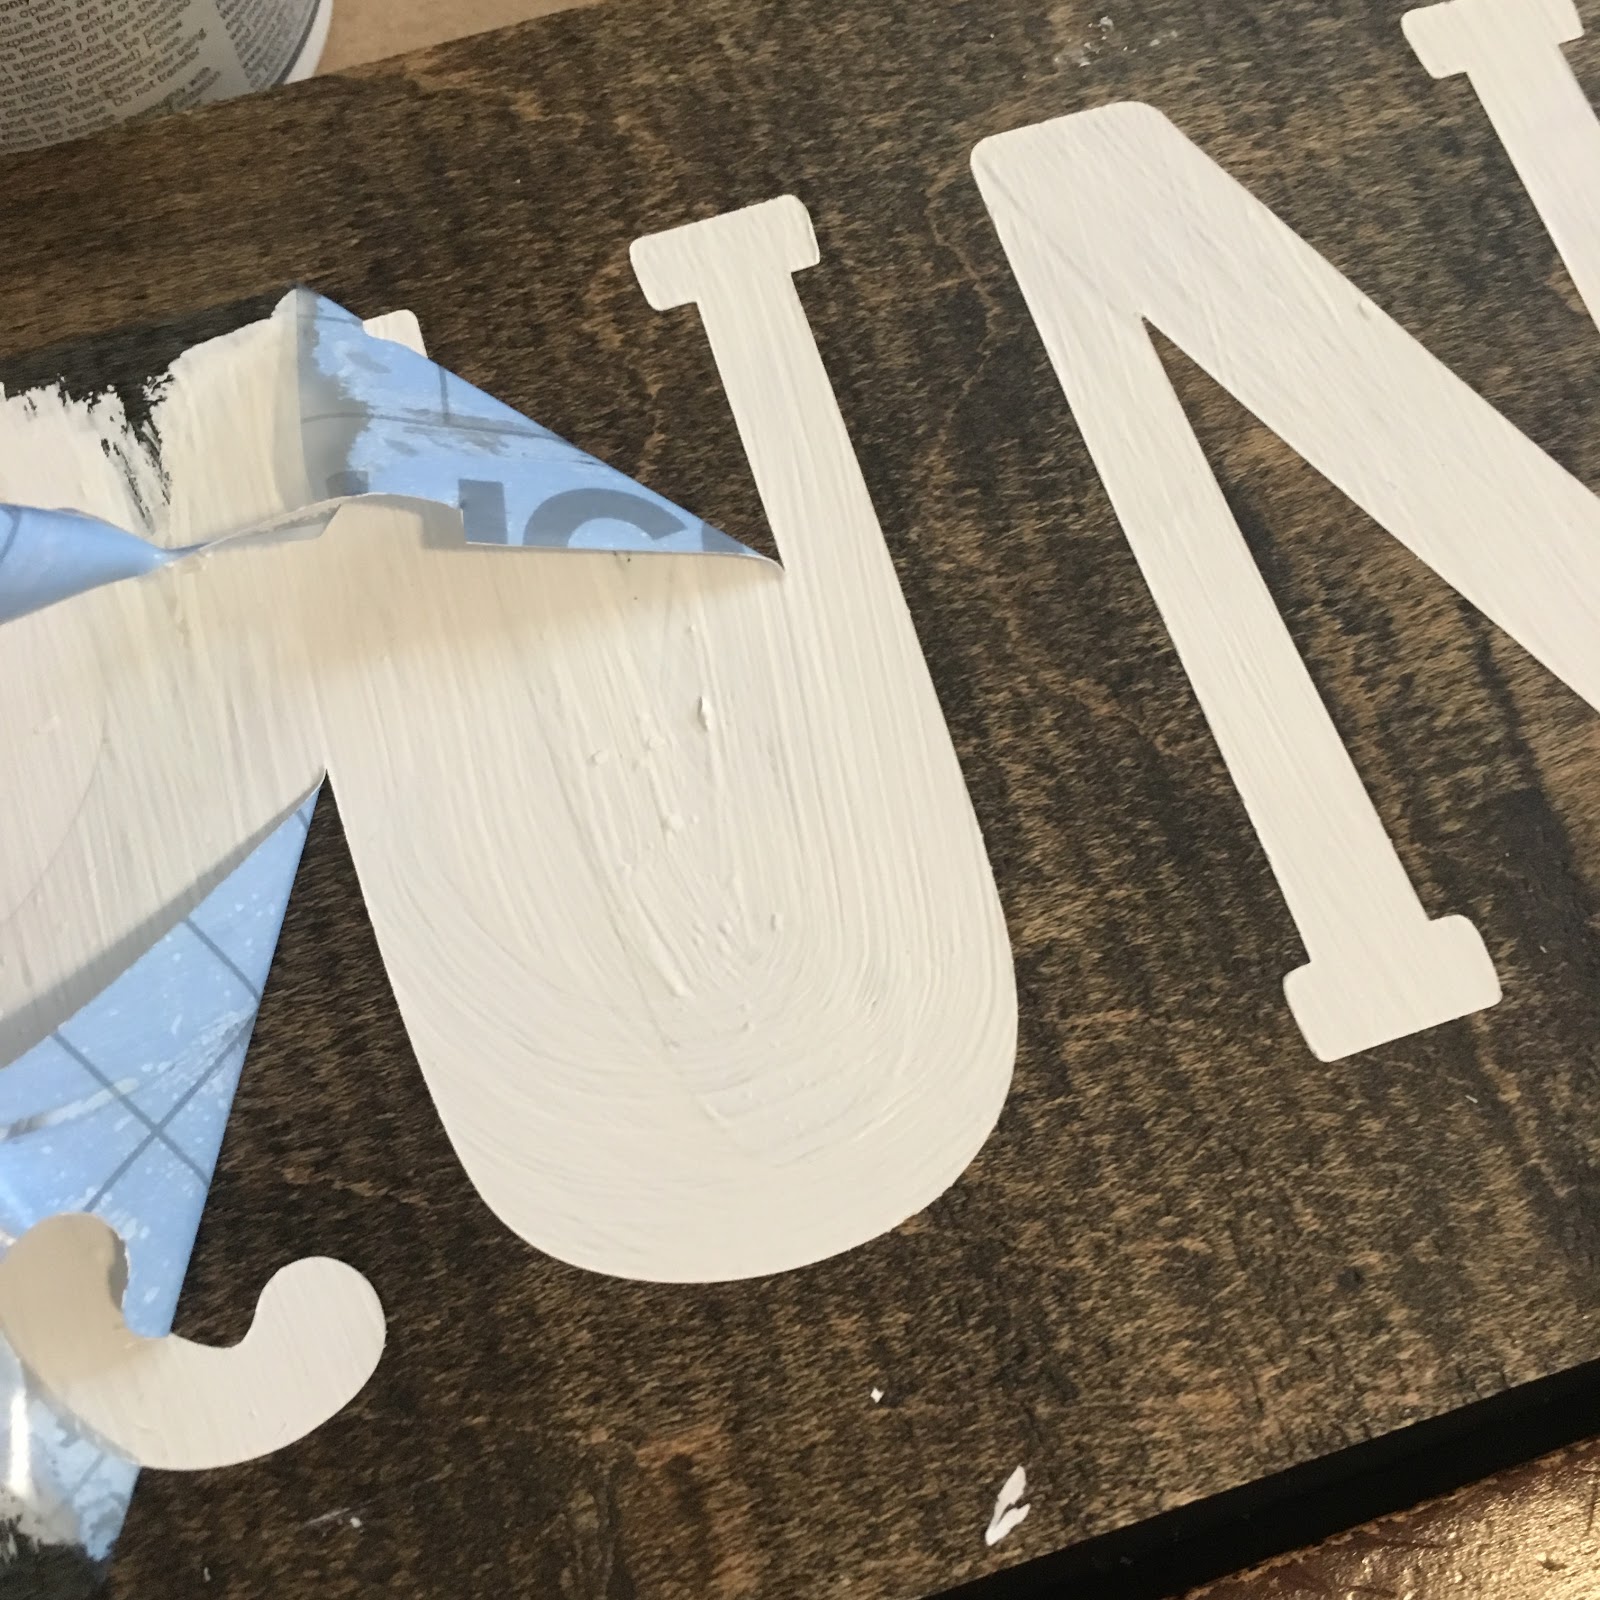
My old medal holder was painted wood with adhesive vinyl on top, but this time I wanted to try out stenciling with chalk paint. I was able to the arrange the words onto one 12"x12" box and sent my design to the Silhouette on a pre-cut 12"x12" sheet of vinyl stenciling material. I used Cricut stenciling vinyl, which I would highly recommend!

Next came the weeding. Remember that I plan to use this as a stencil, so I was weeding the words out and leaving the negative space in. Felt weird, since I usually weed out the negative space! I put some Craftopia transfer tape on top, cut the pieces, and transferred them onto the wood. I used a ruler to make sure they were relatively even before burnishing them on there. Don't be afraid to burnish them well since you don't want paint to end up seeping under the stencil.


After peeling off the transfer tape, I started to chalk paint the letters. With stenciling, you want to *dab* more than paint so that you're not getting paint under the stencil. You can use a foam brush, a dauber tool, or even a makeup sponge. I used a foam brush and did a few light coats of Annie Sloan chalk paint in Pure White. Since there isn't any pigment in this shade, it takes a few coats to get it to be opaque.

Side note: I purchased this small sample size from a local shop in Old Town Auburn called Re-Find Living. The staff is very knowledgeable about all things chalk paint and has great advice! I highly recommend checking them out if you're local.

I let it fully dry (about 30 minutes) before peeling off the sticker. I wasn't sure how it would turn out since we had some bleeding problems with lettering at my last craft night, but letting the paint dry fully really worked! I got nice clean edges.
The last design element of this project involved putting a heart at the center. It both illustrates the quote on the board and is a nod to my habit of searching for heart-shaped rocks on long trail runs. To this end, I planned to use one of the heart-shaped rocks from my collection to mount in the center of the board using a strong epoxy glue. But when I had it lined up, each rock I chose was either the wrong size or just blended into the color of the wood.
 |
| My five-year-old lined up our heart-rock collection in the shape of a heart. See his little boy foot down there?? He's got flat-lay skills already. |
Then I remembered the mountainscapes I had been obsessing over lately - painting different layered gradients of the same color to demonstrate atmospheric perspective. I thought that would be the perfect way to paint a heart in the center of this piece, as it would be a tie-in to my love of the mountains and canyons in Auburn, CA where I run.
I went back to Silhouette Studio and traced a simple clipart heart shape to fit the space and had my machine cut it onto a scrap of the stenciling material.
Then I used a mix of blue with a dot of green acrylic craft paint, some white paint, and some black paint, and created five shades of the same color. I put the heart stencil on the board and carefully painted in the mountain scene. There's a great Youtube tutorial of the process by artist Studio Silver Creek that can be viewed here if you want to try the technique yourself.


After that dried, I peeled back the stencil and again found clean lines (phew!).
Last steps involved the hardware: I used two sawtooth hangers on the back and attached them with tiny nails. Then I screwed three cup hooks into the bottom of the board and added a 1/2" dowel that had been stained to match the board.

I culled my medal collection to weed out duplicates from the same races in different years or medals for shorter distance races, and carefully hung up my favorites.

I love how it turned out! I feel like it represents me well. It's proudly on display in my little office nook in our playroom. It brings me joy every day! How do you display your running bling?
No comments:
Post a Comment